Emergency Roof Repair: What to Do in the First 24 Hours
When disaster strikes, every minute counts. This comprehensive guide walks you through immediate safety steps, proven temporary fixes, and how to get professional help fast.
Need Immediate Help? We have contractors on standby 24/7
Your 24-Hour Emergency Timeline
0-1 Hour: Immediate Safety
URGENT- Move family to safe area away from damage
- Turn off electricity if water is present
- Place buckets under active leaks
- Move valuables and furniture
- Call insurance company hotline
1-4 Hours: Damage Control
URGENT- Document everything with photos/video
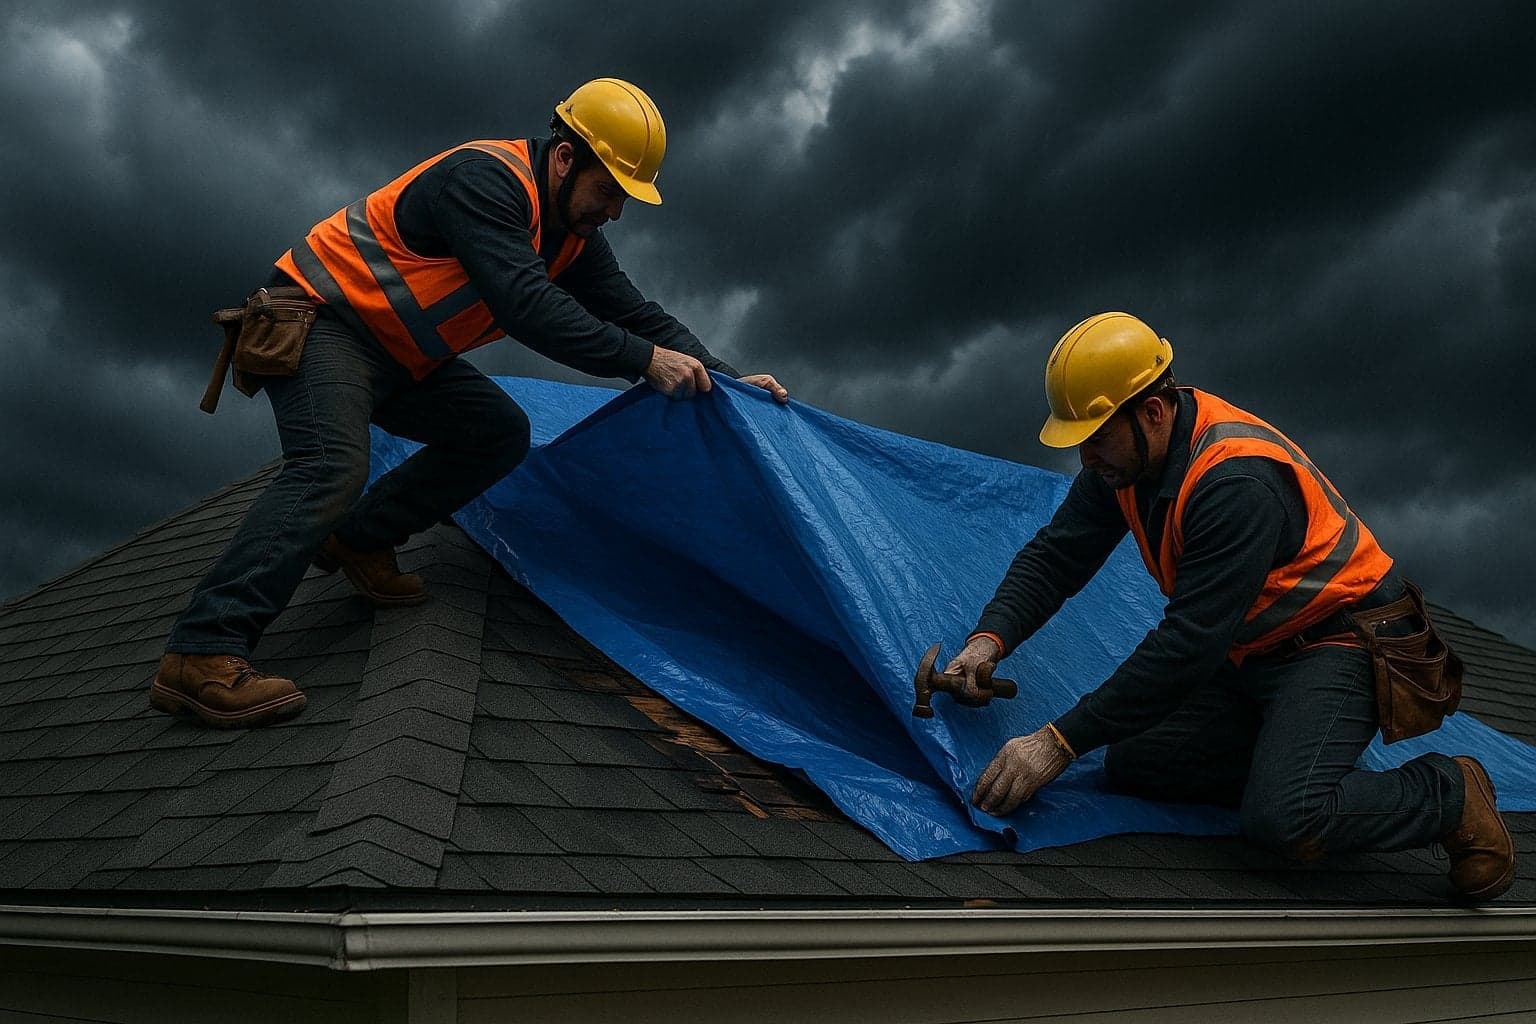
- Apply emergency tarps if safe
- Clear debris from gutters
- Contact emergency repair services
- Inventory damaged belongings
4-12 Hours: Stabilization
- Get multiple repair quotes
- Review insurance coverage
- Arrange temporary accommodations if needed
- Secure the property
- Begin water extraction if needed
12-24 Hours: Recovery Planning
- Meet with insurance adjuster
- Finalize contractor selection
- Create repair timeline
- Plan for ongoing weather
- Communicate with mortgage company
Safety First: Critical Warnings
Never Do This
- • Go on roof during storm
- • Use electrical devices near water
- • Attempt repairs you're unsure about
- • Ignore structural damage signs
- • Wait to call insurance
Always Do This
- • Prioritize family safety
- • Document before touching anything
- • Turn off utilities if needed
- • Call professionals for major damage
- • Keep all receipts
Emergency Temporary Fixes That Actually Work
These are stopgap measures only. Professional repair is always necessary, but these can prevent further damage while you wait.
Small Hole or Puncture
Materials Needed:
- Roofing cement
- Metal flashing
- Putty knife
Expected Duration:
2-4 weeks
Before professional repair needed
Step-by-Step Instructions:
- 1Clean area around hole
- 2Apply roofing cement liberally
- 3Press flashing into cement
- 4Seal edges with more cement
Missing Shingles
Materials Needed:
- Tarp
- 2x4 boards
- Nails
- Roofing cement
Expected Duration:
1-2 weeks
Before professional repair needed
Step-by-Step Instructions:
- 1Slide tarp under existing shingles
- 2Secure with 2x4 frame
- 3Nail through tarp into decking
- 4Seal all edges with cement
Large Area Damage
Materials Needed:
- Heavy duty tarp
- Sandbags
- Rope
- 2x4s
Expected Duration:
1-3 days
Before professional repair needed
Step-by-Step Instructions:
- 1Cover entire damaged section
- 2Extend tarp over ridge
- 3Weight down with sandbags
- 4Create wood frame if possible
Documentation for Maximum Insurance Coverage
Proper documentation can mean the difference between full coverage and claim denial. Follow this exact process.
What to Photograph
Overall damage views
Wide shots from multiple angles
Close-up details
Specific damage points with ruler for scale
Interior damage
Water stains, structural issues
Personal property
Damaged belongings with receipts if available
Documentation Checklist
Finding Legitimate Emergency Contractors
⚠️ Warning: Scammers Target Emergency Situations
Verify credentials even in emergencies. Legitimate contractors understand and won't pressure you.
Green Flags
- • Provides license/insurance immediately
- • Has marked vehicles and uniforms
- • Offers written estimate before work
- • Accepts credit cards/checks
- • Local reputation and references
Red Flags
- • Door-to-door solicitation
- • Cash only payment demands
- • No physical business address
- • Pressure for immediate decision
- • Unusually low or high pricing
Emergency Repair Cost Expectations
Emergency repairs typically cost 50-100% more than scheduled work due to immediate response requirements.
| Service | Cost Range | Key Factors |
|---|---|---|
| Emergency tarp installation | $300-$1,500 | Size, height, severity |
| 24/7 emergency call-out | $200-$500 | Time, distance, weather |
| Temporary patch repair | $200-$800 | Materials, complexity |
| Water extraction | $500-$2,500 | Area affected, equipment |
| Full emergency repair | $1,000-$5,000 | Damage extent, materials |
Pro Tip: Ask if your insurance covers emergency mitigation costs separately from repair limits.
24/7 Emergency Contacts
RoofVista Emergency
Get Free Estimate
Insurance Claims:Ext. 1
Tarp Service:Ext. 2
Water Extraction:Ext. 3
Weather Forecast
Next 24 Hours
Check local forecast for repair window
Your Local Services
Enter your ZIP code to find verified emergency contractors in your area.
Build Your Roof Emergency Kit
Having these items on hand can save crucial time and prevent thousands in additional damage.
Essential Supplies
- Heavy-duty tarps (2-3 sizes)
- Roofing cement (2 tubes)
- 2x4 boards (6-8 pieces)
- Roofing nails & hammer
- Sandbags or weights
Safety & Documentation
- Safety harness & rope
- Waterproof flashlight
- Camera or smartphone
- Insurance info card
- Emergency contact list
Storage Tip: Keep your emergency kit in an easily accessible, waterproof container. Check and refresh supplies annually.
Don't Face Roof Emergencies Alone
RoofVista's network of verified contractors is available 24/7 for emergency repairs. Get help fast from trusted professionals.